Are you busy running around buying last minute gifts, wrapping presents, making cookies or the last minute card? I know that this weekend has been time to pull a lot of things together for me or "out of the hat" so to speak. I've got MOST of the wrapping done - had to make sure I could get everything back to NY so the DH called a friend and we have borrowed a covered trailer so that I could be sure that my bows wouldn't crush and my paper wouldn't get soggy in the ski carrier. I didn't want to wait until Chirstmas Eve to wrap - that's when I start to relax and enjoy. So, I've had the Christmas cd's going and plenty of tape on hand to do my Martha thing.
I also fit some time in to stamp and thought I would share a few projects. I'm gonna be brief on the supplies so that I can do a few more things before we head to a Christmas party tonight. First up are some Christmas cards. I had to wait until they made their way to mailboxes but if they haven't, sit tight - I was a little late this year.
I loved my Papertrey Ink September release sets. This card was deisgned by one of the design team members. I found it as I cruised through their blogs looking for ideas on how to use the stamps. This tree is so pretty. It's from the Tree Trimming Trio set. I love the swirls and pointed boughs. The buttons were easy to place as the stamp has outlines to help guide you. The set had some pretty ornament stamps that could be used there as well. I chose to follow the sample and used dark buttons (most liekly rescued from an old shirt). The Noel sentiment is also in this set but the background is from Peaceful Poinsettia. I added a silk ribbon bow and antiqued the image using Tim Holtz distress inks. The music note paper was in the Fa La La pack by Making Memories (I think, I've lost the label) but I know I found it at Target last year.
Next up... Vervealisious
This card uses the Ornamental Christmas set from Verve. Tiffany got it for me last year for Christmas and I can't tell you I how much I've used this. It's making it's way onto my gift tags this year and the sentiments found their way onto a few cards throughout the year. It's that versitile and the ornaments are just so elegant. I choose to make this a little more rustic so I picked the solid bulb but paired it with the flair of the cursive sentiment. I then added a picture hanger at the top so I could loop some hemp and "hang" it from the boughs I made. Yes, this stamp is in the set as well. See, it's got lots of neat things for you. The little holly and berries used to adorn the ornament was made with a small punch I found at JoAnn's this year by EK Success. Of course, I had to drive to Detroit to find it because my small store just doesn't have much stock but I did get it on sale and used it on a few things this season. The design paper is Christmas Cheer by K&Company and again, I bought it last year. Do you see the pattern here...I buy (ok, hoard) and then I get around to using. The ribbon was bought with Chirstmas cards in mind. It's just more of the bargains I found at Mary Maxim's this summer. I passed it by at first because it was so dark and then a light bulb clicked off that it would be the perfect color to pair with Christmas red. I scurried - yes I was a bit frantic that it would be gone, and was relieved to find it in their tent sale. See, it just takes me time to find the usefulness of my supplies.
I again softened the edges with Tim Holtz distress ink, this time I went a little darker with Vintage Photo so that it gave the apperance of being in the woods.
Next up...
They're here. Yes, the cabinets have finally arrived. They were a few days late as the manufacturer had to close the plant due to an ice storm but they got in late Thursday night. The staff at good 'ol LumberJack stayed late to pull them off one truck and load them onto one of ours so they could be delivered early Friday morning. I had hoped that some of them would have been installed but no - they apparantly need to acclimate to the termperature of the house before they can be hung or they are likely to crack. Soooo, on Monday the hanging begins. Our kitchen and living room are filled with the unboxed cabinets and I was thrilled to see the color and design. I am VERY pleased. Last minute Shaun and I switched to a Burgandy Cherry and we are so happy we did. They look great check them out...
This is a view of the cabinet that will go over the refrigerator. It's 24 inches deep and it looks like it will hold a ton. I now need a step stool so that I can reach in the way back without the DH's assistance. You also get a view of one of the open shelves that will sit on either side over the sink.
This is a view of one of the smaller cabinets that will sit on either side of the microwave over the stove. At first we were going to have open wine racks/shelves and last minute we switched to enclosed cabinets so that I could fit more in and have less visible clutter. You also get a view of the wall color - a soft earthy mutted yellow. For those of you who know us, it's the same color as our NY kitchen. Also in this view is the tile. What an improvement over the stuff we had before. You'll notice that the base moulding is not up yet in this location as they are waiting for the cabinet to be mounted next to the refridgerator. Here's a look at that...
It's massive. I couldn't even fit it all into the picture. Wouldn't you know that I painted most of the back wall thinking that I didn't know how high the cabinets would go and this is almost 3 inches shy of the ceiling. That means once the crown is installed it will be just skimming the top. Oh well - better safe than sorry. You can see in the background that I skimped on the corner wall because I didn't want to waste time and paint where a cabinet was going to be. I also thought it might be fun for the next person that redoes the kitchen to see a little of the history of it's changes throughout time.
Ok - gotta go finish some wrapping.
Have a great week as we enter the Christmas season. We'll be heading to NY on Wednesday so I don't know if I'll have time to get back to you before then. Thank you for your support and kind words as I journey through the world of paper arts. While I wish I could create side by side with all of you, it's been fun to share my creations and inspirations via the net.
I wish you Peace and Happiness for the coming year.
Love, Cath
Sunday, December 20, 2009
Saturday, December 12, 2009
A Cheery Greeting
Hello Everyone!
Hope you are having fun preparing for the holidays. I have visions of Christmas cookies baking, cards being mailed, and presents being wrapped. I'll have to settle for the presents bought and the kitchen being primed and painted. Our new cabinets will be delivered next week and I can't tell you how exicted we are and ready. Living out of boxes and seeing white dust everyday is getting a little old. On a good note, the bathroom demolition was a great improvement along with the tile floor and new casings for all the windows and doors. Pulling the refridgerator out of the closet and finally exposing a pantry is pure bliss. Our goal is to finish painting that this weekend so we can start to put our food in there and off the hallway floor. Keep your fingers crossed that I have the energy to complete this.
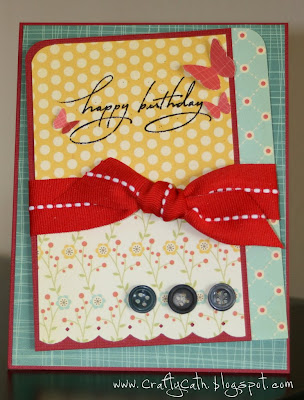
Knowing that I had lots to do in the kitchen today, I was up early again so that I could create. Early was 3am because I couldn't sleep. The creating consisted of a new card that I cased from Amy Sheffer. I bought the Cosmo Cricket Early Bird 6x6 DP when I visited my sissy this summer and I haven't really used it. Amy created this card using the papers and I just had to give it a try. Her ability to combine colors amazes me. I would not have come up with this combo on my own and yet I love it!
I added a heat embossed birthday sentiment and some Martha Stewart punched butterflies. A few stray buttons (I'm learning to recycle these off shirts that won't cut it for the Salvation Army) and a ribbon bow make this a done deal.
Enjoy the rest of your weekend and thanks for looking.
Cath
Sunday, December 6, 2009
A Christening
Yes, I'm alive. Thanksgiving preparations, kitchen renovations, and Christmas shopping have left me with very little creative time. I made sure to get up early this weekend since we were staying in town so that I could relax in my craft haven. Shaun doesn't understand why I would get up at 6am on the weekend, but with so much to do, I wanted to make sure I found some time for me. I had two projects this weekend. First up is a Christening card for my newest nephew, John Patrick (Jack). The whole family headed to DC for the special event but the DH and I just couldn't swing another trip. After hearing about all the snow they got - way before we did I might add - I'm not so distraught. That would have been a treacherous trip through the PA mountains. Can't believe they actually got snow before we did!
Ok, on to the card.
I know this looks a little grown up for a baby but I loved the navy and copper color combo and decided to make a go of it. The DP is from SEI's Moravia pack. It was a steal a few weeks back on Michael's clearance rack. I love the rich colors and mix and match patterns. I thought a Nestabilites Label 4 frame for the cross image would lighten the mood up. The Celtic Cross stamp is from Inkadinkadoo and was stamped with Encore Ultimate Metallic ink in Bronze. It shimers so much in real life but I don't think you can see it in the picture. If you click on the picture, you can blow the image up and see it a little better. You can even see that I cut a second image out and popped it up with dimensionals to give it a little more depth. The sentiment was created on my computer using the LD Adornment font and it was cut out with the SU Word punch.
Note: The font was a freebie I got on scrapnfonts. If you haven't been there yet you should check it out because they always have fonts in the freebie basket. I just went there to confirm the site address for you and they in fact have five fonts that I haven't got yet, Whoo Hoo! This site used to have lots of fonts for the Creative Keepsakes publication and they start with CK. I've used quite a few of those on my work as well.
Tags to treasure...
My second project is an adorable snowman that I colored using my Copics. I then added some Polar White Flower Soft for the snow and Ultra Fine Glitter Snow on the snowflakes. Again, the picture does not do this justice. I think my light might be part of the problem. Too many chores during daylight hours meant that the picture clarity was sacrificed. Sorry guys. This stamp is by Art Impressions and I used scraps from Linda and John's print sample paper to make these. It makes a difference on the way the Copics are absorbed but I reasoned that it was a tag and would be hardly noticed. While I would be hard pressed to throw this out, I know that only so many things in life can be saved.
That's all I have for today folks. The DH is putsing around in the kitchen which means that he wants dinner so I had better get moving before more than his stomache is growling.
Thanks for stopping by and have a good week.
Friday, November 20, 2009
Belated Birthday - Again!!!
Hello Everyone. Hope you are having a great week. I forgot to post this over the weekend 'cause we were busy painting - again! Couldn't sleep this morning and thought I'd be productive and share my creation with you.
I know I've showed you this image before but I just loved the happiness that Bella was having and wanted to share it with my "niece" Ali. Of course, as with most things these days, I am late in expressing birthday sentiments. All the travel back and forth to NY to paint and clean out closets is wearing me down. I can't believe how fast the holidays are creeping up. Ok, I digress, sorry. Back to the card, this is a freebie image from Mo Manning at Paper Craft Planet. Be sure to head over to Mo's group there to grab this for yourself. I of course colored Bella and Bronte with my Copics - the color is just so vibrant. I'm getting the hang of the blending a little better and especially love what I was able to do with Bronte. This card took a long time to color but the foundation of the card is pretty basic. I just used some DP paper I got on clearance from Hobby Lobby. It's called Urban Window by We R Memory Keepers and I paired it with the pretty teal from My Minds Eye. Next is the addition of the yummy ribbon from my Mary Maxim stash and a few brads at the top. The sentiment is fittingly by Stamping Bella.
This is finally in the mail and on it's way. Hope she likes it as much as I had fun coloring.
We just started demolition on the kitchen in our Michigan home. We are updating the cabinets (thanks to the LumberJack employee discount) as well as tearing out the small 1/2 bathroom so that we can bring our fridge out of the closet. We're super excited but the thought of living out of boxes for the next 4 weeks brings on another sigh. Oh well, the wait and hassle will be worth it as we will finally have a descent kitchen instead of a one wall "baby" kitchen. Here are some pictures to give you an idea.
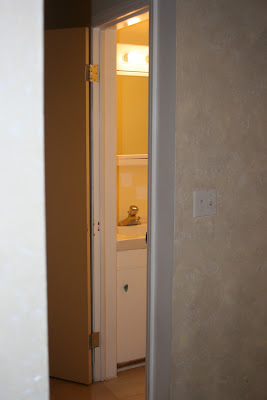
This is a view of the fridge in the closet on the left and to the right is the bathroom. It's very dark in this little space and we can't open the door to the fridge all the way. We will be removing the bathroom and adding cabinets to frame the fridge while still letting in light from the small window.
Here's a view of the wall on the right that will be coming down. There is a small sliver of light coming from the bathroom. The color is cheery but nothing else is. Can't wait for it to be gone!
This is a view of the one row of cabinets and counter top we have. It's old and cluttered. We will be putting a new microwave over the stove and adding a dish washer so I can say goodbye to the dishrack that has a forever presence on our counter. Next will be to move toaster over to the left while keeping only my spices and knives next to the stove. Now do you see where I've been coming from each time I complain about this little space?
I'll keep you posted as we progress.
Thanks for stopping by and enjoy your Friday!
Cath
Card Details:
Paper: Neenah Columbia Crest Solar White, DP Urban Window by We R Memory Keepers and My Minds Eye
Ink: HP printer for the digital image and Copics, Memento Tuxedo Black for the sentiment
Stamps: Stamping Bella for the sentiment, Mo's Digital Pencil for Bella and Bronte
Accessories: turquoise ribbon by Offray, brads from my stash and dimensionals. No nesties this time...oh my goodness how did that happen?
Wednesday, November 11, 2009
PTI Christmas
OMG it's mid week and I have something to share. This is a card I made with my family a few weeks back. I used the Papertrey Ink (PTI) September release sets for this creation. This is actually a card I cased from one of the design team members. Since I went to each and everyone of them for ideas I'm sorry to say that I can't remember which one came up with this layout. This was pretty easy though. Simply stamp an image or two, add a little Tim Holtz Antique Linen Distress Ink to give the vintage or aged apperance, a silky ribbon and some buttons to finish it off.
The tree is from the Tree Trimming Trio set. I love this set. You can choose from a tree with flourish or modern circles (I have one of those to share later). The Noel sentiment also came from this set. The background of the sentiment panel is from the Peacefull Poinsettia set. It's actually one of the many poinsettia choices you have. Some images have solid petals like this one and some are open so you can color. Love the choices. Mostly, I love that these sets all work so well together.
Hope you enjoy!
Cath
Card Details:
Paper: AC Moore red and speckled ivory cardstock (I got this when they first came to town a few years back and they no longer sell this. Darn because it's nice and thick and stands firm.) Musical Note DP is Making Memories Fa la la (purchased at Target last year)
Stamps: Papertrey Ink Tree Trimming Trio and Peacefull Poinsettia
Ink: SU! Real Red, Memento Rich Cocoa
Accessories: Tim Holtz Antique Linen Distress Ink, buttons, SU! oval punches, pinking shears, May Arts silk ribbon, Zots dots
Sunday, November 8, 2009
Fleur De Lis Birthday
Hello everyone! Another week has gone by - and quickly at that. Hope you all had some great weather like we did. Spent most of Saturday in the yard raking 26 bags of leaves and that just covers the front lawn! I was itching to get into my craft room but I thought I should take advantage of the weather and help the hubby so that he didn't have to do the leaves on his own. Together it took us most of the day - on his own he wouldn't have finished.
I was able to find play time today and first up is a birthday card using the Nestabilites Pendant set - Fleur De Lis.
I've had this set for about 3 months and have yet to use it. I marked a card from Becka Feeken when these were first released to give a try someday. I thought it would make a great layout for today's post. As things typically happen, we find things in parts and they somehow come together. I found this DP by Three Bugs in a Rug that had a similar pattern, and I thought it would make a good match with this set. Couldn't believe I was making a card without coloring but at least I used my Nesties! This really was very simple, it's just a cut of the pendant three different ways and with different paper to piece together. A silky organza ribbon bow, a lucious pearl button and a quick tag finish it all off. The tag was speckled using Coffee Shop Tattered Angels Glimmer Mist. The sentiment is from Verve's Birthday Surprise set.
Have a great week and thanks for looking!
Cath
Card Details:
Paper: Neenah Columbia Crest Solar White, Blue Shimmer, Brown Bazzil and Island Reef DP by Three Bugs in A Rug
Ink: Memento Rich Cocoa ink
Stamps: Verve Birthday Surprise
Accessories: Dress It Up fancy pearl button, white satin organza ribbon, Nestabilities Fluer De Lis and Tags 5, Coffee Shop Tattered Angels Glimmer Mist
Saturday, October 31, 2009
A Friend Found
Well Ok - so it's been awhile. We've been back and forth between NY and Michigan trying to get the NY house ready for sale. We're having new carpet installed this weekend so the whole updstairs is a mess. I've had little time available for crafting but am getting together with my Mom and Aunts tonight. Christmas cards are on the agenda so hopefully I'll have something to share with you a little later as well.
Let's Celebrate!
This card is another digital stamp that Mo Manning gave us for free on Paper Craft Planet. She was celebrating the milestone of having 500 members. I joined just under 300 and I can't believe how quickly her numbers grow. This image reminded me of a great big Whoo Hoo and I thought that it would be wonderful card for my lost college friend Bridget. We were lost mostly because I got married and moved and didn't keep in contact. Bridget hunted me down recently by sending a letter to the NY house and it finally found it's way to Michigan. I'm so glad that she made the effort. She's trying to get me to head to UD (University of Dayton) in June for our 25 year reunion. I can't believe how time has flown.
Now on to the card... The design paper is from Cosmo Crickets Early Bird 6x6 paper stack and I love it. I found it at Photo Scraps in Maryland on my last trip to see my Sissy. I have always admired the paper but could never find it locally so I was glad it was the last thing I saw before checking out. The cardstock is Bazzil and of course I used Neenah Classic Crest Solar White for the card base and main image panel. I used Copics to color and Prisma pencils for the highlights around the image. The sentiment was computer generated and layered with paper scraps then embellished with a button and double sided satin ribbon. Martha Stewart's Cornice border punch helped give me a little more charm to the right side.
Thanks for looking and enjoy your Trick-or-Treating~
Cath
Card Details:
Image: Mo Mannig Digital freebie from Paper Craft Planet Group
Sentiment is computer generated.
Ink: Copics and Prisma pencils with OMS
Paper: Cosmo Cricket Early Brid DP, Bazzil colored cardstock, Neennah Classic Crest Solar White
Accessories: Nestabilites Classic Circle and Labels five (I think), button, satin ribbon, dimensionals and Martha Stewart Cornice border punch
Monday, October 12, 2009
'Tis the Season
Catch your breath everyone - it's Monday night and I have a post. This is another project that I worked on over the weekend using my new Papertrey Ink September release sets.
I couldn't wait to use my new Ocean Tides paper and coordinating stamp pad. (Just so you know, Papertrey Ink coordinates their papers, ink pads, ribbon, and buttons.) I love the way the teal shade looks with Red so it's a favorite of mine for snowflakes and winter scenes. It's so hard to find this shade locally and I've been searching forever. I wanted it to go with some gorgeous DP called Figgy Pudding Snow by Basic Grey that I bought last year on clearance after the Christmas season (I told you it's been awhile). But I didn't want to cover it up like I would with a main center stage image. This top heavy sentiment panel gave me the opportunity to display an image and still show off the great snowflakes below.
I opened lots of packages for this card. It's the first time I used my Ocean tides paper and ink pad, Hero Arts felt snowflakes, Martha Stewart Snowflake around the page border punch, and Winter Swirls clear stamp set. They all look pretty good together don't you think~
Thanks for stopping by and have a great week!
Sunday, October 11, 2009
Christmas Blessings
Hello All! Wow, another week has flown by. Things got pretty hectic here. I had inventory at good old LumberJack on Thrsday night. We started at 4pm and went throught the night until 6:30 am. Yup, it was exhausting and hard to change the body clock to sleep during the day on Thursday. I even stayed up most of the night on Wednesday so that I would tire myself out...just didn't happen. Anyway, Tom and Angela headed in for a Johnny Cash impersonator show on Friday evening and she and I hit the craft room on Saturday morning. Here is one of our projects.
I finally put some ink to the September release sets from Papertrey Ink. I loved all the samples the design team came up with and couldn't decide which one I liked best - so I bought the whole dang release. What I found is that they are very interchangeable and we had fun making this card. We actually cased a sample Dawn McVey revealed on her blog. Since I also had the Stocking Prints set we added a little stocking embellishment to change the look just a bit.
For the first time in a long time, this card was all stamps and no coloring. The background Design paper was even stamped! While we didn't use copics, we did use quite a few ink colors - SU Ruby Red, Memento Rich Cocoa (I love how this ink smells like cocoa when you open it)and Enclore Honeydew Metallic. We also distressed the ivory sentiment strip with Tim Holtz Antique Linen.
Some neat little additions make this more sentimental too - I pulled out my Grandma craft stash and had a small strip of white ribbon with hanging balls. We cut a little piece to put under the stocking top and I think it's just neat. I also pulled out my button stash and added a button to the center of the silk bow. The border was cut from the Fiskars treading water border punch but I covered the punched holes so it looks like a simple scallop edge.
Here's a guide to the stamp sets used:
Sentiment: Dawn McVey's own Signature Christmas
Background Design paper: Vintage Labels
Stocking: Stocking Prints
Pretty simple and fun to case.
Enjoy the rest of your weekend and thanks for stopping by!
Cathy
Sunday, October 4, 2009
Trick or Treat Bella
Phew...I finished the sauce, cleaned the house, did the laundry, got my winter clothes out and the summer clothes put away and now I can share with you the next card I made today.
I pulled out my Trickortreatabella and played with Copics again. This time I added some yummy sugar coating tangerine glitter from Doodle Bug. If you can believe it, I bought it last year at Mary Maxim and have yet to try it out. I love the glitter and shine it added to the pumpkins. I will definately be pulling this out again this season.
The spiderweb came from the Martha Stewart corner punch. I simply trimed it up so that I could add it as an embellishment. I also applied a silky bat with dimensionals. The bats actually came as a ribbon that you trim as you need. Lizzy carried these last year and I stocked up because I thought they were so cute and I had no idea where I would find the likes of them again.
This was pretty easy, just a few cuts with my paper trimmer and a fussy 45 minutes to get Bella's colors right.
Have a great week. Thanks for stopping by.
Cath
Card Details:
Stamps: Trickortreatabella by Stamping Bella, Sentiment by Memory Box
Ink: Memento Tuxedo Black
Paper: Bazzil colored cardstock, K&Company Halloween Specialty Paper, Neenah Classic Crest Solar White
Accessories: Copics, Martha Stewart Spiderweb Corner punch, silky bat, Tangerine Glitter by Doodle Bug, Nestabilites ribbon tags
Trick or Treat
Hello Everyone! Can't believe how fast the week went. I don't know where you are visiting from but it sure feels like we are heading into winter more than fall in Michigan. It rained much of the day yesterday and can you believe that I didn't touch one card on World Card Making Day? I went shopping instead and bought more Copics at Mary Maxims and then proceeded to incorporate them into today's card. So I was sorta on the same page as making cards!!
So here's today's creation. This is another digital image from The Digital Pencil Too only I was lucky to get this one for free as a follower of Mo's Group on Paper Craft Planet. If you like these images, I encourage you to head on over. There is a wonderful gallery from fellow followers so it gives you an idea how to color them. If that isn't enough, Mo throws freebies in under her discussions from time to time and that's a great way to increase your digital supply. I'm hooked, I'll tell ya that.
Halloween witch is making the rounds with Bronte (a dog) dressed up as a cat. Too cute! I used a bizzilion copic colors but like the way you get shading and dimension. I also added some Smooch - Taffy on the cat ears, Green Apple on the belt of the hat and pockets and Molasses on Witchy's candy caldrun. The moon has a touch of Golden Star Sakura Gel Pen and the pumpkin has Copper Star. The sentiment was stamped in Jet Black StazOn and is from an Impression Obsession Clear stamp set. I brought out my new Martha Stewart Spider Web border punch to tie into the DP. The paper was a bargain from the end of the season last year and I like the subtle design it ads to the background for this image.
I'm trying to get a pot of tomato sauce going - I love colder days when pots can simmer on the stove and fill the house with wonderful aromas. I'll try to get at another card after I finish some chores. Hope you all enjoy the rest of your weekend.
Thanks for stopping by!
Cath
Card Details:
Stamps: Digital witch by Mo's Digital Pencil Too, Impression Obsesion sentiment
Ink: HP printer for main image colored with Copics and Jet Black StazOn for the sentiment
Paper: Making Memories Spellbound DP, Bazzil Marmalade Blast and Black, Neenah Classic Crest Solar White
Accessories: Smooch, Sakura Gel Pen, Martha Stewart Spider Web border punch, black ribbon by Offray, dimensionals, Copics
Monday, September 28, 2009
Fairy Tabia
Hello All! We just returned from another trip back to NY. This weekend our task was to complete the painting of our son's old room and it looks great! Funny how everything comes together when you decide to move on and yet while you're there you have a never ending "honey do" jar. I completed this card for my niece's birthday before we left in the hopes that I could deliver it in person but I was only lucky enough to leave it with her parents.
I had been cruising my regular blogs last week and came across a gorgeous image on PaulaBella's blog. She explained that she had visited Mo's store The Digital Pencil Too. Mo sells digital images. She is an illustrator of children's books and has made images available for you to download, color and incorporate into your art projects. Be prepared to ooh and ahh. The images are gorgeous. So lifelike and full of spunk! I quickly got my credit card out and bought a few. Here's my first...Fairy Tabia.
I simply downloaded the digital image into Photo manager on my computer and then copied it into word. I sized it so that I could fit four to a 8 1/2 x 11 inch page. Then I printed it onto my Neenah Classic Crest Solar White. I was concerned how Copics would work with the HP ink but I was very impressed. There wasn't any bleeding and the printer gave a nice crisp image without the mess of inking a stamp, cleaning it, possibly rocking it and smudging the impression, and then storing them. Loved it!! I was leary at first but they've got me sold.
Now onto the details. Tabia was colored with Copics but I highlighted her wings and bubbles with Angel Wings Shimmerz. How perfect is that? The stars on her skirt were filled in with a Silver Gel pen. Here's a better look at all the sparkles.
A shimery bow, sparkly DP and silver embossing powder complete the glittery effect.
Are you sold yet?
Have a great week and thanks for stopping by!
Cath
Details:
Image: The Digital Pencil Too - Fairy Tabia, Sentiment by Stamping Bella
Ink: HP printer for image colored with Copics
Paper: Neenah Classic Crest Solar White, AC colored cardstock, Me and My Big Ideas DP
Accessories: Nestabilities Classic Squares, Angel Wings Shimmerz, Gel Pen, Silver Dew drops, silver brad, VersaMark and silver embossing powder, heat gun, dimensionals and organza ribbon
Sunday, September 20, 2009
Sparkly Thanks
I bought some new paper from my local Scrapbook store Destination Marysville last week. They were still celebrating their Grand Opening and I wanted to see what else they might have gotten in. I hit the jack pot with some sparkly paper, Cosmo Cricket, and some great red and opaque snowflakes. My reciept was entered into their gift give away and I got a call on Friday that that receipt won. I picked up my gift but believe it would be better used for Scrapbookers so it looks like my Sissy gets another Chirstmas Gift.
This card uses two complimentary sheets of design paper from Piggy Tales. They're from the la belle et la bete collection. One side is a plain color and the other is glittered. The back of the pink is orange with hot pink glittered flourishes. The back of the orange is the hot pink medallians with orange glitter. I simply cut circles from the repeating pattern, added a scrumptuous hot pink satin ribbon, a Stampin Up! sentiment on Nestabilities Labels 1 and raised the medallians with dimensionals. Pretty simple and very little stamping. Love the bright colors - the photo does not do the glitter justice.
Card Details:
Paper: Piggy Tales, Neenah Solar White
Stamps: Stampin Up! Sincere Salutations
Ink: Memento Tuxedo Black
Accessories: Double Faced Satin ribbon dimensionals, Nestabilities Labels One and circles
Thanks for stopping by. Enjoy your day!
Thank Yous Galore
Hello Everyone! I can't believe another week has flown by. I had intended to do a midweek post but I just didn't get there. I even had the pictures taken but by the time I get home, get dinner going and finally sit it's almost time for me to hit the hay. Anyway, last weekend I spent a great deal of time on some much needed thank yous. I was so excited about all my birthday gifts and wanted to express my gratitude to everyone. Of course, I couldn't do it the easy way and create just one, that gets boring, so I made a few different ones. Some were mailed last week the rest will be this week. You won't know which one is coming your way so I'm not totally spilling the beans.
Tranquil Turquoise
Silke Ledlow does alot of white on white cards. I was inspired by a card I saw on her blog to give it a try. I love the result. It's simple looking, not a lot of layers or colors, and yet there is alot going on. First, I used my Scor-pal to create the indentation lines at the top of the card. Next, I used my paper piercer to create the line at the bottom. I used a vintage brad inside a one hole button to create the embellishment at the top. The flowers were all hand cut and placed on dimensionals. Not a lot of coloring for this one - yet there is color. I purposely used a flower stamp that would fill with color rather than me coloring since I knew that I would have a great deal of cutting. And that's the jist of this one!
Grapefully Thankful
This is another Silke inspired card. I again used the Scor-Pal to create the embosed weave at the top of the white insert. I used this tuitorial from Amy Sheffer and it made this daunting task VERY easy. I used my Fiskars leaf border punch for the bottom. I little stamping for the grapes and sentiment as well as a little coloring with my Copics brought your eye full circle between the background, ribbon and main image.
This was my first try at doing a decorative hat pin. I loved the way they embellish a card, bought all the parts a while ago, but just never found a project that it fit with. I thought it would be great with this one. Besides, Silke used one on her card and I thought it looked yummy! It's pretty easy to do. You just layer beads and silver accents and clip it with a bead crimper so that it doesn't slide apart.
ThankFALLy
This is a duplicate of the previous card but I used fall colors and an EK Success punch. The pendant image is from Hero Arts and I just stamped it three times - once in Memento Tuxedo Black, once in Pumpkin Spice Versa Magic and the top layer is ColorBox Amber Clay Chalk Ink. I then cut the top two to layer this and make it look more like a real flower. I simple brad is holding it all together. The Thank you sentiment is from a larger SU sentment stamp. I simply inked only this portion and stamped it using my Stamp-a-ma-jig. (First you stamp on vellum, place the stamp-a-ma-jig (SAMJ) up to your stamp, remove the stamp and mark the outline of it so you'll know where to place the SAMJ the next time - then place the vellum over the area you want, put your stamp-a-ma-jig down over the stamp outline, slide the vellum out and place your stamp down. It should fit perfectly. Ok this sounds pretty easy but executing is a little tricky! I had never actually done this before but again had all the tools to do it. Yesterday was a day of trying new things. I've learned that I am great at buying so that I have all the latest and greatest tools but I'm frightened to try them out. It took me three times before I got it somewhat right - don't look too closely. Linda, I know that you will anyway so this excludes you. But at least I tried and am happy with the result.)
Ok - this is way longer than I intended. See, I should have had the mid week post. I'd like to get to some more stamping so I'll return to update all the supplies a little later.
Enjoy the rest of your weekend.
Thanks for stopping by.
Cath
Sunday, September 13, 2009
Dual SFYTT
Hello everyone and Happy Sunday - again! Do you see the pattern here? Guess you could say I'm more of a weekend warrior. Anyway, hope you all are enjoying your weekend. I spent a great deal of the day yesterday making cards. After being on the road last weekend I had some catching up to do.
We recently had a new Scrapbooking store open in town (Destination Marysville) and I wanted to send a card to the owner to wish her well. I turned to Jen del Muro's SFYTT to give me the bones. It's much easier to have a layout to follow and just pick the papers, embellishments and stamps. Another great tip I've learned searching my favorite blogs, is to use the papers that coordinate from paper packs so that they automatically go together. It saves a heck of a lot of time trying to find the right color shade to compliment single sheets.
Flowahbella was colored using Copics and touched up with Prismacolor pencils and gamsol. The little shamrock in the good luck sentiment was colored with Green Apple Smooch. Smooch is a Pearlized Accent Ink that looks like nail polish and comes with a very thin applicator. I love it! I've seen these forsale on some internet sites but I was lucky to have found this one at Photo Scraps while I was on vacation in Maryland last weekend. I'm sooo glad I bought it - it's very fun to use.
Here's a peek at the inside...
I generated the sentiment panel on my computer using the LD QuickNote font. The scallop border was made using a Fiskars scallop punch that also had circles punched out but the turquoise paper covers them up.
Onto Card Number 2
I made another card using the same layout and it has a totally different feel. This is a Halloween card that I started with my niece McKenz last weekend. I bought a clear Halloween set from Impression Obsession while at the Novi Rubber stamp convention. I thought it was so different and would be great for my bigger kids. Wait till you see some of the other images that I haven't inked up yet! Anyway, for this one, I remembered some feather "flowers" that I picked up from Hobby Lobby last year for 90% off at the end of the season. I bought them because I thought they would look great in a vase for the fall season. But I also believe they look neat with this image. The stamp has tendrils that flow down from the pumpkin and it reminded me of feathery masks and such. I simply stamped the image twice and cut the bowl out to place over the feather ends to cover them up.
The papers are from Martha Stewart and we got these for 50% off last weekend from Michaels. I love traveling simply to visit new stores...it seems that each region carries its own merchandise patterns and lines. I miss all the choices and feel very limited in Michigan. UGHH. I guess that means that I'll have to travel more frequently. He he! Ok, on to the card.
The bats came from my EK Success Bat Border punch. I simply recycled some for this card. The Halloween sentiment is from a pack of Holiday Clear Sentiments I picked up from Target last year. They say by Marcella K but if you look at the back they are really by K&Company and that must be the name they use to distribute for Target stores. A strand of paper cording I purchased in the jewelry section is wrapped around a brad to hold the sentiment panel onto to the card. I had to use Black StazOn ink for the sentiment to get the full image to transfer to the paper. That's the one thing that I find hard with clear stamps, sometimes ink has a hard time adhering to the whole image and it leaves an impression that looks splotchy. The StazOn had a nice clean transfer - yeah!
Anyway, I like the way this turned out and can see me making this card again for the rest of the "girls" this halloween.
I also have a few more pictures of my new nephew Jack that I thought I would share.
Here he is with my niece McKenz holding him on Labor Day.
Here he is all on his own - 4 days old and sleeping soundly. He did alot of that while we visited. I guess being born is pretty exhausting!
Hope you enjoy the rest of your day and thanks for looking.
Cath
Card Details:
Flowahbella
Stamps: Flowahbella and Good Luck sentiment from Stamping Bella
Ink: Memento Tuxedo Black and Copics (along with Prismacolor pencils and gamsol for blending)
Paper: Neenah White, Bazzil Gold cardstock, AC Turquoise cardstock, K&Company Wild Raspberry DP
Accessories: Green Apple Smooch, Brenda Walton adhesive rhinestones, dimensionals, Nestabilities square, large and small circles, Labels 4, Fiskars border punch, computer font LD Quick Note
Halloween Wishes
Stamps: Impression Obsession and Marcella K
Ink: Memento Tuxedo Black and Copics for the main image panel, Jet Black StazOn for the sentiment
Paper: Neenah White, Bazzil Black, Martha Stewart DP
Accessories: Nestabilities large and small circles, EK Success bat border punch, feathers, brads by the Paper Studio, Bella paper cording by Darice, dimensionals, Art Glitter glue
Sunday, September 6, 2009
New Baby Jack is Here!!!
Hello everyone and Happy Sunday. Our Labor Day visit with my sister Linda has had an added bonus - my younger sister went into labor and Jack arrived at 5:30pm on Thursday, September 3rd. We went to the hospital to see the newest nephew yesterday and I thought I would share a picture of my niece Madison holding him along with the card I made for his arrival.
We didn't know what sex the baby was going to be so I had both pink and blue stuff packed and quick made this while drinking a margarita on the back deck Friday afternoon. I was quite pleased with the result! Linda brought me to a great scrapbooking store outside of Baltimore in the town of Eldersburg, MD called PhotoScraps. As a card maker, I was stunned by how much stuff was available for me. There were Unity stamps, Stamping Bella, Hero Arts, Smooch, Glimmer Mist, Copics, Nestabilites, tons of My Minds Eye paper, Cosmo Cricket, Bazzil cardstock in about 100 colors...it just took me away. We only got to play for about an hour as the men were with us. They found a gin mill in the same plaza but we also had to get back to pickup the kids from school. Anyway, I picked up the papers for this card there since I brought so much more of my pink supply.
The Booties stamp is mounted wood from Inkadinkado. I purchased this from the new Scrapbook store in Michigan called Destination Marysville. Connie just opened on Tuesday, the 1st and of course I had to check it out. She had a small selection of stamps and I bought this to use for my newest niece or nephew's card. I loved the size of it (about 2 1/2 x 2 inches). The sentiment tag was made from a round wooden stick from Judith (also purchased on clearance just for Jack from PhotoScraps - they only had one and it just happened to be the Boy stamp - Yeah!) Linda used my Blue Sky Glimmer Mist to add some color and texture and then highlighted it with Jumbo Java VersaMagic. I loved it!
On to the details...
Paper: My Minds Eye DP, Bazzil cardstock, Neenah Classic Crest Solar White
Stamps: Inkadinkado, Judith
Ink: Memento Tuxedo Black, Copics, and Jumbo Java VersaMagic
Accessories: Creative Cafe Fuzzy brads, Nestabilities Large and Small Ovals, and Tags 5, dimensionals and hemp twine from Close to my Heart, Blue Sky Glimmer Mist
Hope y'all have a great Holiday weekend and thanks for looking!
Love Ya,
Cath
Wednesday, September 2, 2009
Arghhh....Ahoy Matey!
Hello Everyone! Happy midweek or over the hump day. I have a quick card to share with you. I needed a birthday card to send to my nephew. While he loves skulls, I'm not so fond of them. I caved and decided that I could settle on a pirate theme. I had picked up some glitter rub ons after the Halloween season last year. I am definately more of a stamper but these looked irresistable. Remembering where I put them was more of a challenge. Armed with rub ons I only had to play with paper. I saw this color scheme in blog land and just loved it.
The black glossy design paper is from Me and My Big Ideas but the red and green papers are from Martha Stewart. My sentiment is from Stamping Bella and I used Close to My Heart white craft ink. To give the sentiment "flag" some extra love I used dimensionals. This card was pretty easy once I had the colors picked. On the inside I stamped a tall ship and colored it with my Copics. I would have shared it with you but I had already signed it and I didn't think you would want to see my personal birthday wishes.
Hope you enjoy the rest of your week.
Love Ya,
Cath
Sunday, August 30, 2009
Back to School
Hello everyone! Today started out just great. It's my Birthday and I don't have to go to work! Then, I was strugling with this card last night and woke up to an epihany on what to do to spiff it up. There's some history that I should share first.
Last month, my sister sent my birthday gift to NY with my daughter. It was a combined gift from the two of them and my Mom. They wanted to take advantage of no shipping and make sure I would have it for my birthday. Daughter wanted me to open it in front of her so she could see my face. Now I wasn't too excited about opening my birthday gift a month early because what would I have to look forward to for the big day? Anyway, I saw the box and knew it was a Slice. I had been trying to win one for months on Danielle's site "Life One Layout at a Time" but was only successful in winning Lin the Bind it All and me some Shimmerz and Spritz. I was very happy with my prize and knew that Linda would love hers. But the Slice always eluded me. Then there it was in front of me and I was psyched! I had never used one before but liked the idea of it.
Then, my Michigan friends Debbie and Denice took me out for a birthday dinner on Thursday and gave me a great new purse. If you know me, you know I am purse picky and this one fit me to a T. Love it! Husband organized these guys to attend a birthday dinner for me at the club on Friday night with spouses and we had another great evening. I got more gifts too; some Moscato di Asti wine and a gift card to Hobby Lobby. Oh my, these guys spoiled me. I couldn't wait to go shopping. They said they wanted to get me Slice stuff but they didn't know what to get. Since it's so new to me I didn't know either. I headed off yesterday morning with gift card in hand and searched the aisles. First, I headed for Spellbinders. I had heard that Hobby Lobby was finally expanding their selection and I wanted to see what was in stock. Of course the new pendants were all sold out so I meandered on. That brought me to the clearance section. I found two Slice cartridges. One was Fall Back to School and the other was Fa La La. Perfect, that should cover the next two seasons.
I wanted to make a card for all my Back to School nieces, nephews and school aged friends. I struggled though. What papers, layout, die cuts should I use? This ended up so much better than where it was headed last night. The apple and "a,b,c" came from the slice. The tag is from the Spellbinders tags 5 and the border punch is the Martha Stewart Cornice edge. The red and white paper is by DCWV and the brown was a scrap from my pile. I didn't have a "back to school" stamp so I had to hand write my sentiment. I used my dauber to add some Memento ink to distress it a bit. I finished it off with some sheer black ribbon from Offray - more from my Mary Maxim super clearance stash.
I hope those of you heading back to school have some great adventures this year. Knowledge is power so study hard!
Love you all. Thanks for stopping by and have a great week!
Cath
Saturday, August 22, 2009
Life deserves a Woo Hoo...
I saw this dress sentiment stamp at the Novi Rubber Stamp convention I went to earlier this month and just had to have it. My friend Sue saw me eyeing it and told me she already had it. She also offered to share it with me so I could make a few impressions - how great is that? I just loved this sentiment. I think it should be our mantra and speaks volumes about not only going outside our comfort zone - but doing so with pleasure and loving life! A few people immediately came to mind as to who I could share it with...some as inspiration, some as birthday sentiments.
Anywhooo, I needed a sketch and headed over to iheart2stamp to see what Jen had for this week's SFYTT (that's sketch for you to try). I always check her out on Saturday but haven't had the time to participate. This week's sketch I thought worked great with my long sentiment panel so I sought out some papers to make this work. I pulled out the K&Company Wild Saffron Designer Paper as well as some K&Company embellishments that I found eons ago and never found the right project for. I thought the colors blended nicely here and also added glitter and bling. What girl doesn't like that combination in a greeting?
Anyway, notice that I changed the sketch up just a little because the original used two designer papers where I have the brown patch and ribbon. It just looked too busy with the big sentiment panel and I felt the ribbon "tied" it together much better.
Here's a peek inside where I used some scraps from the front background paper and my Deckled Rectangle Nestabilites to create a sentiment panel. Since the butterfly showed on the DP I added a dimensional butterfly from the kit and drew on antenae.
Here's a look at the same card in red.
Again, I used K&Company embellishments and Wild Saffron DP. You'll notice here that they are again a perfect match. Can you catch the red paisley in the lower right corner of the DP? It mirrors the embellishment - a red and blue paisley! I finally found a use for these guys Woo Hoo! I used a tag from the embellishment kit here for the inside of the card...
A few blue brads from The Paper Studio brings all the colors together as well as a bump up flower to enhance the flower that came on the tag.
Why don't you try giving this sketch a try yourself and see what you come up with? Then head on over to Jen's blog to see what everyone else has done.
Hope you are enjoying the rest of your weekend.
Thanks for looking!
Cath
Card Details:
Stamp: "Woo Hoo" Dress by Paula Best
Ink: Sentiment: Memento Tuxedo Black and Water Color pencils, Close to Cocoa to distress with dauber
Paper: K&Company Wild Saffron DP, Bazzil plain cardstock
Accessories: Offray ribbon, K&Company flower embellishments, Nestabilities long rectangle and scalloped rectangle dies, dimensionals, Aqua Pen, corner punch
It's a Bikababebella...
So excited, I just got some new Stamping Bellas delivered and I just had to ink them up. The first one I tried is Bikababebella and I think she is just too cute. I colored her up with Copics using a few tips I picked up at the Rubber stamp convention. I always started with the lightest color and then highlighted with a darker color, then came back to blend with the lighter color. The ladies showed me to color dark and then push color out with a lighter color. It worked! I've admired so many artists for their ability to bring depth to their colored images and I'm trying to develope mine.
On to the card, after coloring my image on Neenah Columbia Crest Solar White paper, I used my Nestabilites rectangles to cut her out. The DP is Basic Grey Urban Prairie. The colored card stock is Bazzil. The border punch is from Fiskars and the wired ribbon is from Offray. My sentiment is also from Stamping Bella.
I think Bella looks ready to take on the world in her own free spirited way! Wish I was confident enough to comandeer a bike on my own. For now, I'm content to let my DH block a good wind and I get to enjoy the ride. Speaking of which, it's finally cooled down a bit here and we're hoping to take our bike out tomorrow. I'm still hoping to get some card time in - I have a few more Bellas to play with.
Hope you all enjoy your weekend and I'll be back before you know it.
Love Ya,
Cath
Wednesday, August 12, 2009
Wedding Wishes
Ok, I made this card this past weekend. The DH needed a card for a co-worker so I set out to make him one. I wanted to try a monotone color scheme to keep the look simple yet elegant. I also added lots of shimmery paper to dress it up but it doesn't show very well in the picture. If you click on the image you can enlarge it and see the detail better.
Now onto the details, I started with Neenah Columbia Crest Solar White cardstock, added a silver metallic layer and a layer of shimmery DP from DCWV called The Luxury Stack. I backed this layer with another piece of white cardstock that I imprinted with the Martha Stewart Embossing Scallop punch and then wrapped it with an ivory satin ribbon bow. The image panel was layered with the Nestabilities Classic large and small ovals and raised using dimensionals. The sentiment is from the SU! Wonderful Words set. I finished this off with four silver Dew Drops. Not so hard, right?
Here's a peak at the inside...
I started with the DCWV DP and then added my sentiment panel using a wooden stamp from My Sentiments Exactly. I likely picked this up from Hobby Lobby when they had a 50% off stamp sale. I topped this panel off with Kaiser mini pearls. Not alot of coloring or stamping but I think this would be a great on hand card so I quickly made another. That's almost a rule I follow - while the paper is all out and I have a sample to quickly measure, I make another.
I have some interesting stamps to share with you soon. I picked them up at the Heirloom Rubber Stamp Convention in Novi, MI a few weeks ago. I had never been to a stamp convention but I'll tell you that it was fun to do make and takes, see new techniques and buy paper crafting supplies on sale and in front of you. I like to touch and see the products and try them and this was a great opportunity to do so. Novi is about 1 1/2 hours from me so it wasn't a bad drive. Actually it was just a little further than my old commute to Southfield. I actually cringed while I drove through 696 especially since 4 lanes were reduced to 1. I cringed thinking what that morning commute would be like today. I'm so thankful that I'm not doing that any longer.
One of my newest additions to the craft room was a stash of Flower Soft. I tried it out at the Impression Obsession booth and loved the way it gave life to the flowers on my image. I can't wait to start creating using this fun product.
So...be on the lookout for some new projects coming soon.
Thanks for stopping by!
Cath
Blog Candy of your dreams...
Hey everyone, I know that it appears that I have been MIA but it's summer so I've been having fun with some things other than stamping. My crafting is done mostly on weekends and if I travel, visit art fairs, a rubber stamp convention, or garden, then that time is diminished. I have a few projects to share so sit tight.
First I want to let you know about some awesome blog candy I have stumbled across...how would you like $150 to spend at the vendor of your choice? If that sounds appealing to you then visit this blog and leave a comment to be entered to win. The contest ends on the 28th of August so you have some time yet to participate.
Good Luck!
Cath
Sunday, July 19, 2009
Birthdays Galore...
Well another weekend has quickly gone by. I spent some time in the craft room to relax and wind down after the busy work week. My new AR clerk has 6 days off so now I am wearing 3 hats again. I can't belive how busy I am but of course this is our busy season... I get lucky to only have a three day work week coming up as we are heading back to NY again on Wednesday evening. Daughter Jessica will be heading home as well and I look forward to seeing her - it seems like ages have gone by since we were last together.
I'm sharing a few birthday cards that I made this weekend. The first is a simple and elegant black, white,teal combo. I love it. I actually made another version as well but I thought it was a little darker than this one because it had a black accent strip but the DH thought it would be scarry to get such a dark card. He usually has some sound advise so I listened and lightened it up to the card below.
I started with a balck card base and added a black and white grid pattern from a specialty cardstock pack by me & my Big ideas. I love, love, love it. It reminds me a lot of the grid pattern stamps by Papertrey Ink. I topped it with a Nestabilities label 4 panel. Now most of you know that these don't nest to 1/8 inch like much of the other dies so I had to cut my DP (also from the me & my Big ideas pack) and then trim it to be 1/8 inch smaller than the black. This is a tedious task but I love the result and am glad I made the effort. Next I added a sentiment panel using the Nestabilities classic large ovals and large oval scallops. The sentiment is from SU's Sincere Salutations. I stamped the image on Neenah Classic Crest Solar White cardstock using the Memento Tuxedo Black ink. I am a firm believer that your images will improve using the right combo of paper and ink and this one works great for me.
Of course a card wouldn't be finished without some Swarkovski crystals to bring the sentiment center stage. I like the way it makes this feel classy. I repeated the background and label 4 panel inside for my greeting and this card is a wrap.
Ketto Bella
Next up, I colored one of my new Stamping Bella images called Phoebe Ketto. I loved her bouquet of hearts and her angelic wings. I have a story to share about the Shimmerz Angel Wings I used to color these wings. I have wanted these shimmery paint accents for some time now but couldn't find them locally. The only way to get them was to order them on-line. I'm trying to be a little frugal and hate to pay shipping charges so I patiently held back adding these to my stash (and believe me my stash is growing - the DH loves to remind me of that!). Anyway - you probably think that I caved in but nope - as luck would have it, I entered a contest on "Life One Layout at a Time" and had my name pulled for the free Shimmerz and Spritz. I think I directed you all there in March and again in May. I patiently waited for my new items to arrive and I was so thrilled to get the package you should have heard the squeal of delight when I found the Angel Wings white bottle inside. There were also three other colors, Sunflower, Pumpkin (which I can't wait to use for fall) and Hottie Pink (I think this would be great on cards for Lisa, the girlies, Stephanie - gosh I can't wait to get creating!) I also received two colors of Spritz, Saphire and Concrete. I used the Saphire to color a plain silk flower and loved how it came out. Ok, sorry for the chatter but I was so happy to have won these and Danielle couldn't have picked better colors for me if she knew me. You wouldn't belive how hard it was to wait for their arrival. Sissy Linda (Scrappy Lin) won the Bind-It-All from the same site in early March - just in time for her 40th! She was equally as excited since she does the scrapbooking. She made a gorgeous book of the girls from their birthday party and her pictures and journalling make you feel like you were there dancing along. Ok ok on to the picture...
I started with a Neenah Solar White card base and added red cardstock and a cute strawberry pattern from Out & About by My Minds Eye. I used the Nesties large classic circle dies to make the sentiment panel and the classic large square and scalloped square for the main image panel. I colored Phoebe with my Copics and had fun trying a new hair coloring technique. Linda Heavens was a great starting point for this challenge and I was pleased with the result. The sentiment is a Stampabilities wood stamp I picked up from Hobby Lobby. I added a satin ribbon and tied it off with a silk flower, button combo. I even pulled out the Sunflower Shimmerz to make the flower sparkle. Loved it!
I kept the same background for the inside of the card and added a compter generated sentiment. That that.
Have a great week everyone and I'll catch up with you again soon.
Thanks for looking!
Cath
Sunday, July 5, 2009
Our work is never done...
Hello everyone and hapy Sunday, again! We were quite content to be home this weekend and work in our gardens, relax on the back veranda, or in my case run to my craft room to create. Of course there is always the laundry that needed changing, food that needed preparing and an errand or two at the mall but I am pleased to say that I also had plenty of time to set about finishing some cards that needed to be made.
First up is a baby card...
This is another Amy Sheffer - yes I can do it too! I have changed the image and added a sentiment tag but the paper and layout are hers. I had more of the DCWV Nana's Nursery Boy paper and thought it would be good to use it up. All four design papers come from this pack. The colored cardstock is AC textured cardstock and the white is Neenah Classic Crest Solar White - I love how crisp and white it is. The silver brads and ribbon holders are from Close to my Heart - the ribbon is Martha Stewart twill tape in silver sage. This was a bargain I found at AC Moore last weekend when we were home and it just goes to show that although the DH thinks that I have enough ribbon to wrap the world I can always find something that I know I'll use and that I don't already own!
The image and sentiment were stamped in Mememto Tuxedo Black ink. I used Copics to color the lamb and highlighted with my Copic Multiliners. The lamb stamp came from Hobby Lobby and is by Stampabilities title "Lambie Pie". I thought he was just too cute and could work for baby and Easter cards. The sentiment is from Lizzie's shop and is A Muse Artstamps...a tiny little wooden stamp that I thought would be perfect for tags. I used the Cuttlebug Tiny Tag die to cut it out.
Of course it wouldn't be a card unless I used my Nesties and in this case I used the Circle and Scalloped Circles as well as the Classic Squares. I found a neat tutorial on how to emboss a smaller square die onto the first without cutting through the paper and I used it on the top white square for this card. Here's a tip, make sure you lightly tape your die to the paper or it will move and the lines won't be stratight. It took me three times to get this and I was getting a little testy by the time I was done.
Here's a look at the inside because I link it's as pretty and colorful as the front...
I used scraps from the front paper and used the Nestabilities Large Deckled Rectangles to back the sentiment panel. The sentiment was computer generated. I used a Martha Stewart Border punch to make the row of hearts. I added an old button to finished it off.
Baby Card number two...
So I was in the baby card mode and found a card layout that I thought would work perfectly for the image I wanted to use. Again, I used the DCWV Nana's Nursery Baby Boy pack of design papers and AC textured cardstock for the colored paper. The image is from Stampin'Up! titled Buggies and Booties. I again used Mememto Tuxedo Black ink and added some Swarkovski turquoise crystals to the top edge of the buggy basket. The ribbon is single faced satin I picked up when Mary Maxim's put it all on clearance. Of course, I got it for a steal...and yes I have about 100 yards of it which is why the DH thinks I can wrap the world with all the ribbon I have. The sentiment is from the Inkadinkado clear Baby Boy set.
Here's a peek inside...
I kept the colors from the front of the card and added a big sentiment panel. I borrowed this verse from the American Greetings online card selection and generated it on the computer using the LD Quick Note font. I cut it out with my Large Circle Nesties and backed it with a Large Scalloped Circle that I paper pierced in each scallop. I didn't want to add too much height inside so I didn't use dimensionals but I did on the front. That's it - easy peasy.
Here's number three and I still have one more to make before the weekend ends...
I know, you are probably thinking this might be a little late and it is. I told you that I have great intentions but don't always get to follow through. This has been in pieces on my craft desk and I finally set out to finish it off since we are heading back to NY again this coming weekend. Travelling every other weekend means that I don't get enough time to play in the craft room and complete the necessary cards. It would be easy to pick one up at the store but as a card maker, I just can't justify it. I make cards. I have tons of supplies and that's it. It just might take me a little time to get them done. I digress so on to the card...
For this I started with Bazzil cardstock. I then added some world map and blue ship masts design paper from Close to my Heart. The red DP is some scrap paper I have from a huge jumbo pack I bought eons ago from JoAnn's. I have barely touched it since my tastes have grown but I thought it would work wonderfully as a backdrop to my DAD chip board letters. The letters are K&Compay and the blue and beige were slightly off in color from what I needed so I added some distress Stickles in Faded Jeans and Scattered Straw. They did just the trick to make this look better.
I haven't caved to get the Spellbinders Star dies as I'm trying to be a little frugal here so I cut them out from a stencil I had from my early scrapbooking days. I topped them off with a button and some hemp cording. The top blue Dew Drops were actually silver that I colored with my Copic Marker. I love how easy these take color and how quick they are to dry.
The last tool I used was the Friskars Rope Border punch. With the nautical feel of the papers, I thought it would fit beautifully.
That's it. Phew... I'm off to do some dinner prep work and then I have to work on the next card.
Hope you all a great week. Thanks for looking and I'll be back before you know it.
Cathy
Subscribe to:
Posts (Atom)